The pillows were a wedding gift for one of my husband's coworkers. She asked if he thought I could make something like this (just the pillows ... not the whole thing)...
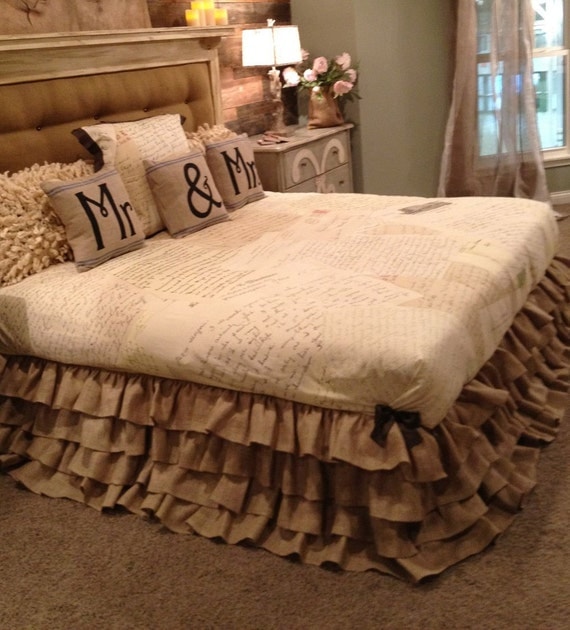 |
| via Etsy, Paula and Erika |
I figured that I could... even though I had no idea how to do it ... so I told her YES! (Biting off more than I can chew is a major personality flaw for me. Fortunately, this didn't turn out to be one of those situations.)
So I started doing a little looking around to see how these pillows were made. It seemed that burlap was all the rage for these kinds of pillows (and lots of other things). After buying some scrap burlap to play around with, I quickly decided that my pillows weren't going to be made of burlap. Maybe other people are working with something different than what I could find locally ... I have no idea how you'd make these pillows (or anything, really) with burlap.
On to Plan B. I wanted something rustic, but burlap was definitely out. I chose a natural, unbleached canvas instead. It's sturdy, attractive, and easy to work with. Because I wanted the pillows to have a little color other than the canvas, I went on the hunt for a border fabric. This was actually harder than I thought it would be. The fabric needed to be rustic, go well with the canvas, and not be too feminine. Eventually, I found a nice brown fabric with a faint floral print. It fit all my needs. So I have my materials. Now what?
The next task was to figure out how to get the words on the canvas. Sew? Stencil? Free-hand paint? Turns out you can print on fabric. Who knew? It's embarrassingly easy to do. A little spray adhesive to attach your fabric to card stock and you're ready to run it through the printer! But what font do I use?
When in doubt, turn to Google. Have you searched the internet for free fonts lately? The choices are OVERWHELMING! After browsing several font sites, I decided to limit my choices by searching for "rustic fonts." I found one called Bleeding Cowboys. It was pretty much perfect.
Okay. I have all my materials and I'm ready to sew. But what if the newlyweds decide to wash the pillows? Will the ink run? After a little testing, turns out the ink does fade fairly quickly in the washer (or at least it did for me). Eeek! What do I do now? Tell them to never ever get their pillows wet? (Is anyone else thinking of Gremlins right now?) No, I didn't want to give someone something that couldn't be washed, so I went in search of how to make the printed fabric more washer friendly. Turns out there's a fix for that, too. I bought a bottle of Bubble Jet Set 2000 (this doesn't even sound like a real product), applied it according to the directions and I was again ready to sew! (This product really did keep the ink from fading in the washer. I did a couple of side-by-side comparisons of printed fabric pretreated vs non pretreated, but didn't take photos ... oops.)
On to the sewing! The basic design for my pillow coverings comes from Rae Gun Ramblings . I obviously had to alter the design a little since the pillows were canvas on the back while the front was canvas and border fabric. If anyone cares how I did this, just ask and I'll explain. I used pillow inserts sized 16x16 and 12x16. I might could have used larger pillow inserts, but the size of my words were limited to the size of a standard piece of paper so I didn't want to go too big.
Anyway, after a slow start and several hurdles, I think the final product turned out well. As you can see, I ended up using a good deal of creating license with the pillows. They don't look much like the ones in the picture ... to me, they look better. The bride-to-be seemed to like them (WHEW! That was a BIG relief), and that's what was really important.


Oh... and I forgot to mention the small hurdle of trying to get the ink color to go with the border fabric color. That was a tough one that required a bunch of trial and error.
I've been making other things, too. Hopefully I'll get those posted tomorrow. Happy crafting!

